I’m going to test out a laminated paper artwork overlay. Here’s a first pass. Actually … Second pass. First one sucked bigtime. This one feels pretty good. I’ll post another photo when it’s laminated and mounted to the case.
Top panel cnc jig
Welp, this is the last jig I needed to make for beatseqr production. It holds the top panel portion of the case so the cnc router can do it’s job. When I was just making one beatseqr at a time I had much much less efficient jigs to hold things on the cnc table, so this is a huge improvement. I’m getting repeatable results that I’m happy with when I cut multiple cases in a session. There’s less guess work, less waste, and less cursing… So overall a good situation.
Also on the final infrastructural push, I designed and built a fume extractor for soldering. Which makes me happier when I’m hunched over a circuit board soldering for hours. Here are some photos :
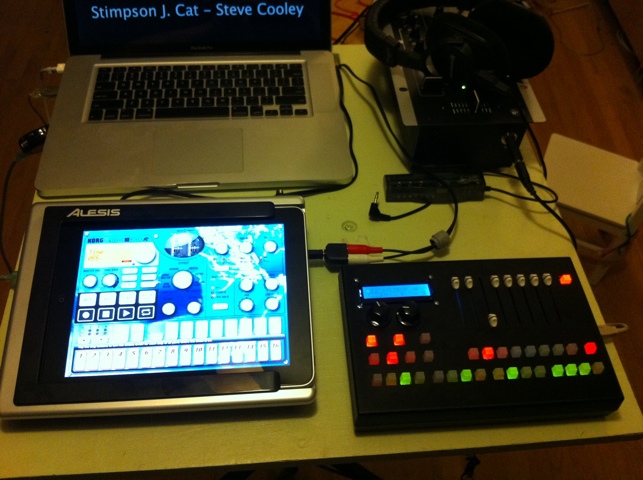
Tools: Alesis IODock for iPad
I just got my Alesis IODock for iPad. It solves some serious live performance problems for me!! Here they are:
1. Playing my iPad live is awesome, but keeping it powered up is a decision between power and midi data. Previously, I would plug in the camera connection kit for midi or a power plug. No more. The IODock has power to keep my iPad charging while in use, and a square style USB port.
2. Speaking of midi… Previously I’d have to connect a midi out usb device from my computer to a midisport UNO connected by the camera connection kit to the ipad. Giant hassles! Now with the IODock, I just go directly from the computer to the dock. No midi devices whatsoever between the computer and the iPad. Sweet!!
3. Flexible outputs… Since there are quarter inch output jacks and a headphone jack, I can use whichever I need to. Sometimes playing live, I can experience the iPad being too quiet… The headphone jack on the IODock gets *crazy* loud. So I have options for different mixing environments.
4. Looks professional. Always helps. Ima cover up this giant Alesis logo post haste, guys. (Sorry Alesis.) But the case looks good, the tilt is nice. A definite plus.
And I guess there are a bunch of other things that are in this box, but the items above cover the price of admission for me! Well done Alesis. This seems like it’s going to be a great product.
-steve
Doing More with Beatseqr demo video
I made this video last night. I was just running through some of the features that I use when I’m using a beatseqr.
Horizontal cnc jig results
Alright, this jig I made to hold the dremel flex shaft horizontally worked *beautifully*. I hand-programmed the gcode, and I obviously have some more fine tuning to do, but overall, I’m on the right track!
Here’s the nice clean hole the jig produced. Adjustments required, but almost there.
Here’s the jig that’s holding the case down.

Video of the jig in action:
Horizontal cnc mod
Alright so one of the last hurdles to jump before I’m ready for production is being ready to cut holes in the sides of the enclosures for the USB cable. I’ve been doing this by hand with a dremel with *extremely* variable results. :-/ So, when my pal Jim was up for a visit earlier this year, he helped brainstorm on some ideas and this was the concept we ended up with. Using the dxf files for the cnc machine, I was able to locate the hole pattern and design a new piece that will bolt on to the existing z axis gantry. This new piece, with the help of some shape lock, securely holds a flex shaft attachment for a dremel… Which in theory should let me jig a beatseqr enclosure to the table and cut nice clean square holes without and problems or sloppiness. In theory. But man, I’m getting really close to having the infrastructure in place to do what I want. Getting pretty exciting up in here!!
Haptic Synapses live at 2011 SubZERO Festival — video
Well it was a long fun night. We had technical problems and came up with great solutions. It was great, and I hope we get to do it again next year. Here’s an hour long video of us playing. Sorry for the lack of light. You get an idea of what was going on, though. It’s available in 720p… and the sound is better at that resolution.
Solving problems: LRF support
When I have a bit more time, I’ll post a video, but I just couldn’t locate mechanically fastening LRF’s to the specs I need. So I drew up a concept on some paper, redrew it in illustrator, exported it to dxf, imported it to sheetcam, and cut a casting mold. I used the smooth-on shore hardness 40 silicone since I’ve decided it’s too tough to work with for my buttons… Turned out pretty good! Maybe a little too tall. But it will be easy enough to slice off this mold and try again. I’m loving the time from concept to iteration. Very fast!! And I’m not committed to hundreds of failed designs. Just a couple few. I’ll even use these for experimental projects.


